Sunday, 28 February 2010
Video experiment 8
Used expressions so that distortion in the video was affected by the distortion in the audio.
Website layout - footage page

The website shall consist of three pages;
The home page (index) will appear somewhat like that showing in the previous post, the left column shall have the 'Blush logo' and links to sections showing the motion and photographic components.
These pages shall appear similar to that above. Clicking on the boxes (currently represented by black rectangles with the number 1 in them) will take you to a plain white page with the image or video in the centre.
Website layout

I've started working on coding the website for the fictional 'Blush' product. Like the other components of the project, this shall utilise a simple black and white appearance and will be fairly basic with three pages.
Blush - photography

Note : Box only mock-up.
Quick photoshoot. I have access to remote fired flash guns so can produce studio style photography. Instead of making my own box I'll purchase a white box (or net) and add the type, I feel this will look more professional.
Monday, 22 February 2010
Website - style

This man
As well as the motion, I intend to expand the brief to incorporate a mini website and some 'promo' style studio photography. Stylistically, I envisage the site as being a bit of a mystery like the videos themselves, using minimalist graphics much like the site above.
Expressions - how to
1. Right click audio > Keyframe assistant > convert to keyframes
2. Should create a new layer at the top called 'Audio Amplitude'
3. Drop down 'effects' on Audio amplitude, then both channels. Should show 'slider'.
4. Alt click the stopwatch besides opacity (or whichever parameter that needs to be altered). This should open expressions for the parameter.
5. Using the pickwhip, select the 'slider' in both channels on the Audio amplitude layer.
6. If not intense enough, add * and a number until desired result is achieved!
Sunday, 21 February 2010
First footage rough edit
This weekend I've shot some rough footage which is more relevant to the final outcome on my camcorder. Using techniques experimented with previously, here is the first outcome...
Exorcist trailer remix
Practice with Final Cut. Done in the Time Based Media session on Monday 15th February with Colin Quinn.
Old film look (experiments)
This is based on the previously mentioned technique however I'm not overly keen on it.
This is based on the originally posted technique, however slightly different. It still lacks the correct style of graininess.
An improvement of the first video in this post, I've lowered the opacity of the white scratches, and added more grain.
In this one, I used the 'wiggler' to alter the hues on the video as it plays, giving it a more random washed out colour.
Sunday, 14 February 2010
Old film look (technique 2)
1. Create a new comp (mine is 320x240, 5 sec long, 24 fps). Import your picture or video into it.
2. Create a new white solid (size: 1x240) and call it "line".
3. Create another solid which is the size of your comp and call it "particles". The color doesn't matter.
4. Turn off the visibility of the layer called "line" by clicking in the eye on its left.
5. On the "particles" layer, apply Particle Playground (Effects > Simulation > Particle Playground) Settings:
Cannon
Canon position: middle bottom (x: 160, y: 240)
Canon radius: 160 (set it to make that the canon is in the center of your comp)
Particles per second: 15
Random direction: 0
Velocity: 5000
Layer Property
Choose layer: "line"
Gravity
Strength: -200
6. Now it's time to preview. The object is to have lines which appear and disappear quickly. Is it what you have?
7. On the "particles" layer, apply Noise (Effect > Noise & Grain > Noise) and set the amount to 80%.
8. Be sure that you are at the first frame in your timeline. Drag your video or picture into your comp. Your video or picture must be below the particle layer .
9. Apply the strobe light effect to your picture or video (Effect > Stylize > Strobe Light) with these settings:
Color: white
Blend with original: 90%
Length (sec): 0.09
Period: 0.15
Random Strobe Probability: 80%
Strobe: Makes Layer Transparent
Strobe Operator: Add
10. Apply an offset to your picture or video. (Effect > Distort > Offset). Set a keyframe at the first frame. Go to the end of your composition and set another keyframe where you'll add 3 pixels to the X position (if your layer position was x: 160, y: 120 at the first frame, set it to x: 163, y: 120 at the last frame).
11. Select the Offset keyframes that you just added (Shortcut: click on your layer and press u - known the über key - then hold shift and click on the keyframes). We will randomize the value by applying the wiggler (Window > The Wiggler). Apply with temporal graph, jagged, frequency: 8, magnitude: 1.
12. Still on your picture or video layer, add Hue/Saturation (Effect > Image Control > Hue/Saturation). You may want a black and white video (click on colorize), or lower the saturation of your video (set master saturation to -60 and contrast to 10, amount: 12%)
13. Add Noise to your picture (amount: 20% - follow the procedure in step 7).
14. Save and preview the result!
Video experiment 1
Using the technique posted previously. Not overly keen on the outcome of this, so I shall explore these effects further.
Thursday, 11 February 2010
Ray Gun Magazine
Mentioned to me by Mark, Ray Gun magazine seems to have much of the grunge aesthetic in its design, such as industrial looking distressed chaotic typography and faded 'damaged' photography. I'm going to look into this further, hopefully acquiring a magazine or book dedicated to the magazine.
"Ray Gun was an American alternative rock-and-roll magazine, first published in 1992 in Santa Monica, California. Led by founding art director David Carson, Ray Gun explored experimental magazine typographic design. The result was a chaotic, abstract style, not always readable, but distinctive in appearance. That tradition for compelling visuals continued even after Carson left the magazine after three years; he was followed by a series of art directors, including Robert Hales, Chris Ashworth, Scott Denton-Cardew, and Jerome Curchod.
In terms of content, Ray Gun was also notable for its choices of subject matter. The cutting-edge advertising, musical artists and pop culture icons spotlighted were typically ahead of the curve, putting such artists as Radiohead, Bjork, Beck, Flaming Lips, PJ Harvey and Eminem on its cover long before its better-known competitors. Those choices were guided by Executive Editor Randy Bookasta and an editorial staff that included Dean Kuipers, Nina Malkin, Mark Blackwell, Joe Donnelly, Jeff Castelaz (who co-founded Dangerbird Records) Grant Alden, Mark Woodlief, & Eric Gladstone.
Ray Gun produced over 70 issues from 1992 through 2000. Owner-founder-publisher Marvin Scott Jarrett (one-time publisher of a late-1980s incarnation of Creem) also created the magazines Bikini, Stick and huH.[citation needed] Jarret is currently editor-in-chief of Nylon, a New York-based fashion magazine.[1] The most notable common thread among all of Jarrett's magazines (from his latter-day Creem through Nylon) has been an attraction to dynamic next-generation graphic design."
http://www.chris-ashworth.com/ray-gun-publish/ray-gun-magazine-covers/
Super 8 effects on DV footage in AE
As mentioned, the video will have a grungy quality to it - lots of speckles and noise and washed out colours. I will need to add this myself, as it will be more then likely filmed on a SD/HD camcorder (unless a better option presents itself). I'm currently researching means of doing this with the post-production software I'm familiar with and plan on shooting a few test clips over the weekend.
Taken from - http://forums.creativecow.net/archivethread/2/555218
1. Add Effects/Time/Posterize Time. Set to 18 fps.
2. Add Effects/Adjust/Levels. Bring in the blacks (crush them) and bring in the Whites (clip them). be heavy handed.
3. Add Effects/Adjust/Hue-Sat/ Drop the master saturation down till the color is pretty faded.
4. Add Effects/Blur/Gaussian Blur. Set to 2.0
5. Add Effects/Stylize/Noise. Set to 18.
6. Add Effects/Adjust/Curves. Goto Red channel. Grab the very left/bottom node and bring it straight up a touch. The blacks will swing red a bit. Then grab the gamma area (the very middle of the curve) and bring it up a bit. Goto the green channel. Grab the gamma area and bring it up as well. Go to the blue channel. Drop the gamma area a bit. This should add a warm, aged look.
Sound test
Started experimenting with audio today. My original idea was to have fairly noisy distorted sound like that on a un-tuned television, however now I have decided to bring more of a link with the band that it'd be better to include some audio from the actual song.
This first experiment takes audio from the live recording, and mixes it with a audio file of some television static and people talking in a hall. I don't have final cut so used Adobe Premiere Pro CS4, which is somewhat similar. I feel it could be improved extensively, however for a first attempt it gives some idea of the final audio outcome of the project.
This first experiment takes audio from the live recording, and mixes it with a audio file of some television static and people talking in a hall. I don't have final cut so used Adobe Premiere Pro CS4, which is somewhat similar. I feel it could be improved extensively, however for a first attempt it gives some idea of the final audio outcome of the project.
Live version of 'Blush'
Live recording of Blush, while the studio version has a very 'distorted' sound, it's still quite deliberate. Being a live recording this version is lower quality and I might sample this as background audio in the Viral videos.
Tuesday, 9 February 2010
1990s alternative scene - assorted imagery
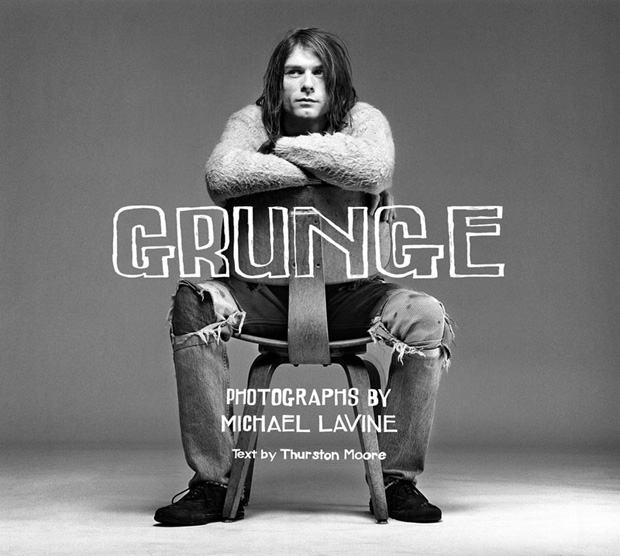
Photography from this era was quite contrasty and often used black and white, such as this image of Kurt Cobain.

Group of girls with the early 1990s grunge look.
http://www.flickr.com/photos/saylamarz/3181975452/
Modern interpretation of grunge
Distorted sound
http://www.youtube.com/watch?v=PH54cp2ggFk
http://www.youtube.com/watch?v=WGVCHDSiBcQ&feature=fvw
http://www.youtube.com/watch?v=V5iVpQlUXxU&feature=related
http://www.youtube.com/watch?v=WGVCHDSiBcQ&feature=fvw
http://www.youtube.com/watch?v=V5iVpQlUXxU&feature=related
Wednesday, 3 February 2010
Grunge music videos
http://www.youtube.com/watch?v=1N29vkIT3eo
http://www.youtube.com/watch?v=hTWKbfoikeg
http://www.youtube.com/watch?v=n6P0SitRwy8
http://www.youtube.com/watch?v=WezGcUA9WjM
http://www.youtube.com/watch?v=hTWKbfoikeg
http://www.youtube.com/watch?v=n6P0SitRwy8
http://www.youtube.com/watch?v=WezGcUA9WjM
Tuesday, 2 February 2010
Initial ideas
A poseable model (a toy figure, clay model, puppet for examples) getting very graphically murdered by another one - intestines ripped out, limbs torn off etc. The idea being to shock. Will have a dirty grungy aesthetic to it, and somewhat choppy animation (18fps instead of 25 for instance).
http://www.youtube.com/watch?v=NiwqRSCWw2g - sort of the style I had in my head.
Make the song blush a mysterious product, a series of short animations showing test footage for advertisements (e.g. a box of 'Blush' rotating, a woman posing with blush) shot silently with super 8 style quality
http://www.youtube.com/watch?v=3bRcGpz7Oy0 - example of super 8
Animated viral videos
http://www.youtube.com/watch?v=hlFAAOiG2po
http://www.youtube.com/watch?v=IueJvLGB_3c
http://www.youtube.com/watch?v=ZSDbH4sQw54&feature=related
http://www.youtube.com/watch?v=WOd6udf4C1k&feature=related
http://www.youtube.com/watch?v=A4fqZsTSTf8&feature=related
http://www.youtube.com/watch?v=IueJvLGB_3c
http://www.youtube.com/watch?v=ZSDbH4sQw54&feature=related
http://www.youtube.com/watch?v=WOd6udf4C1k&feature=related
http://www.youtube.com/watch?v=A4fqZsTSTf8&feature=related
Japanese Voyeurs

Japanese Voyeurs have a grungy sound and look in their existing visual imagery/motion work, which includes somewhat nasty looking images of items relating to the human body and its functions. From reading the description on the bands facebook page they're not afraid of doing what they want.
grunge (grnj)n. Slang
1. Filth; dirt.
2. A style of rock music that incorporates elements of punk rock
and heavy metal, often marked by lyrics exhibiting nihilism or apathy.
[Back-formed from grungy.]
grun·gy (grnj)adj. grun·gi·er, grun·gi·est Slang
In a dirty, rundown, or inferior condition: grungy old jeans.

Should I choose Japanese Voyeurs, I feel the final outcome would involve a certain level of shock for the audience, enough to raise debate on the internet. This could be something extremely bizarre or perhaps something quite gory.
Here's a rather freakish clown, which has a grungy look to it....
http://www.youtube.com/watch?v=hFHBtu6Nb40&feature=fvw
Subscribe to:
Posts (Atom)